I seem to have written a lot about repairing older plywood (and other types of timber construction) boats whether motor boats, sailing dinghies, canoes or motorboats over the years so I would like to bookmark some resources here.
All of them go into some degree of detail about all the processes and decisions involved and some have a significant number of photos as well.
Note that I am usually not the sole contributor in each example … but that is the charm (and the usefulness!!)
If you cannot find what you need here there are a large number or resources on my building FAQ including
how to get oil out of timber, ways of saving money with epoxy, information on cedar strip and lightweight construction, canoes, sailboats, learning to sail, and much, much more.
Is the secondhand plywood boat a keeper? Case Study for a used Cadet Dinghy.
Case study – is this sailing dinghy or other plywood boat a keeper?

The best test is to ask to go for a sail. If the boat seems sluggish or difficult then don’t buy it.
If a sail is not an option ask the owner to rig the boat. If they know how to do it very well then the boat will probably be OK.
Also ask if the boat has been sailed recently. If it hasn’t been used for years then it might not be the best choice
WHAT ARE YOUR PRIORITIES for the boat???
The first thing people need to get their heads around is whether the job is a repair or a restoration.
Many are the boats I have seen where the owner goes WAY TOO FAR with the repair or restoration. They start with a boat that is just about working and take it to bits, starting with something a few weeks from launching and ending up with a six month project.
My suggestion is always look at what you want to achieve at the beginning … if you want to get the boat on the water then don’t take things apart completely. Work to the priorities of your original objective.
The information in the articles in the links below will help your assessment
CASE 1 – Replacing the complete plywood boat hull bottom in 24 hours.
Big panel repairs can be easier to achieve than lots of small fiddly bits.
When we built our original OzRacers we used really cheap ply. It had significant voids and Peter put his feet through the bottom of one (he doesn’t have my catlike agility). It was thin brittle and had voids.
Sometimes it is better to replace the whole panel rather than mess around with paint removal, fixing and several repairs.

When we built our original PDRacers we used really cheap ply. It had significant voids and Peter put his feet through the bottom of one (he doesn’t have my catlike agility). It was thin brittle and had voids.
This is the repair process. We put it on the woodwork forum first but moved it to the link above. It has a whole heap of tricks and techniques you may not know about to make a really short timeline.

It looks like a HUGE job to replace the bottom, but actually it is one of the simplest possible repairs … once you have seen it done.
The method was taught to me by Alan Downes of OZ Moth and Laser notoriety.
This method depends on no fasteners being used in the construction – read about glued construction with no nails or screws.
CASE 2 – A Drop or puncture (hole) to a stitch and glue plywood Eureka canoe and hide the repair.
Repairing/Fixing a hole in a varnished plywood boat – not quite an invisible repair..
Koala had just finished his new Eureka Canoe and … he dropped it on its trolley. A big hole/puncture.

So he sadly came to the woodwork forum with the news that his brand new boat that he had been building for 10 weeks and that he patiently waited until the end of the Slovakian winter to to use had a big hole in it.
Anyway .. he asked how to fix … lots of advice from a bunch of different people and the result was pretty nice. Koala said
The hole is repaired now. I’ve cut out a square bit just enought to come to the good wood. I’ve glues in a new piece and put a glass patch over it on both sides. I don’t doubt about its trenght. As I was cutting and sanding the hull I also glassed the bottom and put 2 coats of varnish on, just to give a bit of extra protection against the scraches.
I wish I could say it’s as good as new as the patch is clearly visible but as Mik said it give the boat a character.Now it’s time to go paddling soon. Hooooooray
CASE 3 – Minimal repair/restoration job for general plywood boat hull – Australian Sabre Plywood dinghy
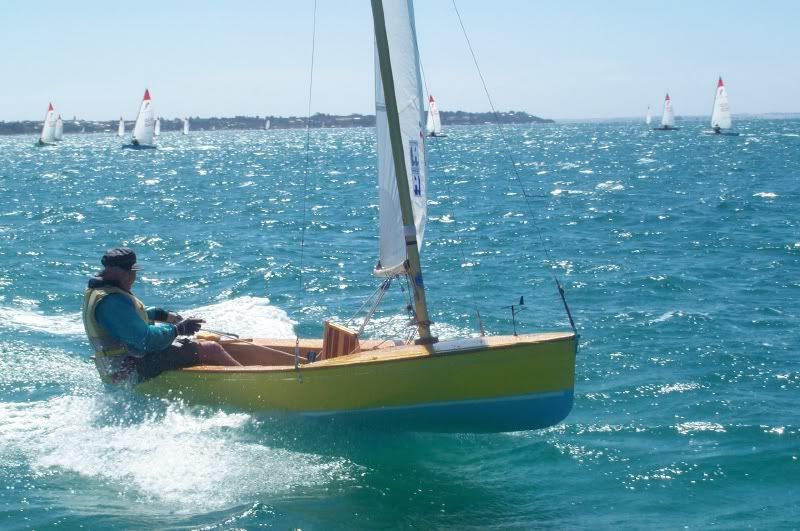
 A few years ago I decided to go racing again … a local class called the Sabre had become very popular at a couple of the local clubs. I bought a clapped-out one on a trailer for $375, bought a new sail, made a new rudder and centreboard blade, replaced a few bits and got the hull into a non leaky state in a very short time.
The hull was in very bad condition but I fixed it by laying lightweight glass cloth in slight hollows I sanded in places where the ply was cracking. Just did the bottom … didn’t touch the topsides.
The boat was quite successful … I didn’t race it for long because I had a bad bike accident in the new year which has damaged my ability to sail for long periods … but while I was racing I was finishing around 4th or 6th in a fleet of 30 … except in light winds. Not me in the pic!
CASE 4 – Replacing Decks/restoration of Ply International Cadet Dinghy for racing
Replacing the deck and restoration of a one-design racing dinghy – International Cadet

The beginning of this discussion was to work out just what the owner had in his hands. If it was old and overweight then he should do the minimum so his son could get a bit of experience then sell it for a new boat at the end of the season.
We were excited to find out that a lot of the fundamentals of the boat were really good .. it was lighter than the class minimum and seemed to be strongly built.
Andrew fixed the boat up over the off-season and did a fantastic job. He came to the project with almost zero background and asked all the right questions on the way through. There is a huge amount of detailed questions and answers on this thread.
CASE 5 – Painting, then damage through use and patchup, fill and repaint.
Painting filling repairing dings and dents in a plywood or timber boat, canoe, yacht or dinghy

I prefer to design boats that are beautiful … but the humble PDRacer finds a special place in my heart. It is a box, but geez we made it sail good!!! Why do I like them?
Because they introduce heaps of people to sailing … that’s why.
But we had to do big repairs to ours … see picture right – 4000km (2500 miles) of this! Well … some of the roads were better!
Anyway … we built two boats for $350 each (that’s for everything) and I documented the original painting process carefully like we did for all the PDRacer building.
Then Peter and Jo brought the boats down to Adelaide from Mooloolaba … a road trip of about 2000km … particularly if you go west then follow the Murray/Darling river down.
The boats suffered a lot from stone chips and stones lodging in strange places and wearing holes in the paint or cutting into the top ply veneer. Happily no structural damage but a serious amount of filling and repair.
So this thread will tell you how to paint a boat nicely … and then if it gets seriously worked over how to make it pretty again with a minimum of labour.
CASE 6 – DIY Nonskid Paint and Varnish for boats.
This is the best non skid paint method for boat cockpits, decks, cabin soles or wherever.

… everything else is done but you now have found your cockpit or decks is too slippery to walk on and you don’t want to use one of the standard deckpaints in those tacky colours with the wetsuit (or leg) eating abrasive grit.
Here is a much better way that is suitable for either varnish or paint. It produces a grippy surface that is soft on whatever it comes into contact with.
It is much more effective than 90% of the adhesive non skid tape that you can buy (though the rubbery one from 3M is the bee’s knees!)
But here … the active ingredient is SUGAR … or similar water soluble crystal. Be sure you rinse the boats well or you will get ants!!!!
Also good for home renovations … bathrooms, the laundry any area where there might be a slippery floor.
CASE 7 – Minimal Repairs an old Plywood Mirror Dinghy – factors and concerns and the need to remove varnish!
This was from the old forum. An old leaky Mirror dinghy. We don’t expect that to happen now with epoxy resin rather than polyester.
The big risk is taking the boat too much apart. See the other dinghy repairs above too.