Modified method for building the classic stitch and glue Eureka Canoe makes the stitching process simpler and easier for any canoe or kayak – these methods have been added to the Eureka Canoe Plan, the Viola Sailing Canoe Plan and the Quick Canoe Plan.

Making the stitching process a bit more controllable.
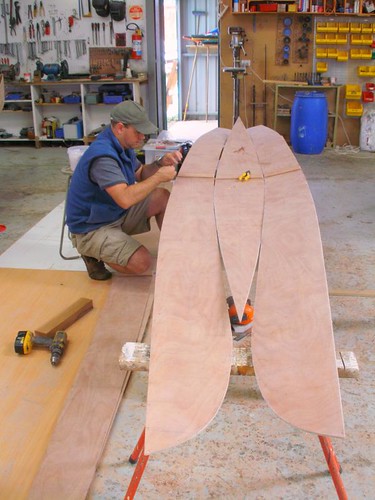
I have some pics of the Eurekas going together in the current Duckflat Autumn school. Which shows how strange the first three panels are when stitched loosely … nothing like a boat … the arching is because the two bilge panels are not at the right angle yet.
We now do it in two separate pieces as per these pics and stitch together. The pics are two separate boats so the order is a bit random … you can follow the set through if you want to see the sequence of both hulls.
http://www.flickr.com/photos/boatmik…7617013281203/
Assemble the bottom three panels of the Canoe

The three bottom panels first all the wires just crossed over and not tightened – this is the beginning

Here is the arching – if it looks like this you are doing OK
The next partial assembly are the two side panels and the spacer bars
The two side panels after separated with the spreader bars, all the wires just crossed over and not tightened… and the bottom arches up because the panels are not separated to their final angle.

The two end spreader bars holding the sheer apart have their end cut with an approx angle and are fastened with a single screw through the ply so they have some option to swivel and correct the bevel.
Putting the two sub assemblies together
Them one on top of the other with crosspieces of scrap timber between and stitch the holes each side of the buttstrap. It looks like it won’t work .. but it does. Initially there is a big gap and as you tie them together working from the centre out toward the ends – all equally from the centre … then it starts closing up


Gunwales need to be clamped on when the taping or filleting is done.
